Using the Edit Tool

Click the pencil icon
 to open your Greeting Page for editing!
Save
 your changes often

Click the X
 to close out and automatically refresh your page
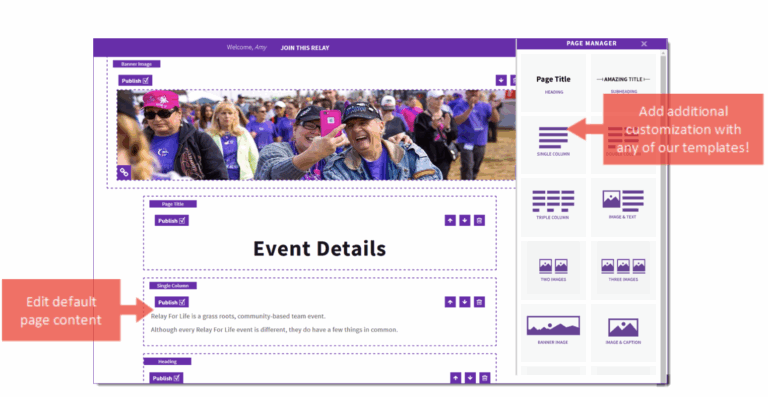
Change Your Banner Image
![]()

Edit Content Blocks


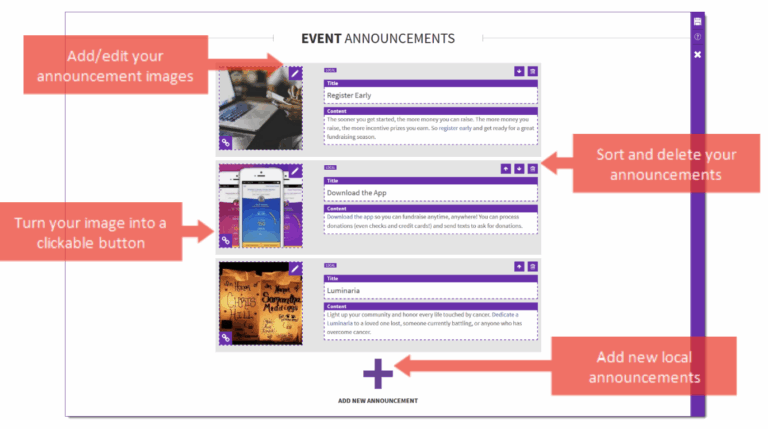
Edit Event Announcements
Sort and Hide Sections

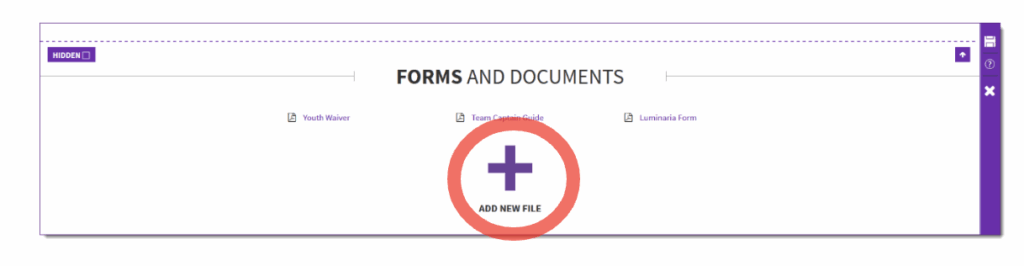
Add Local Forms and Documents
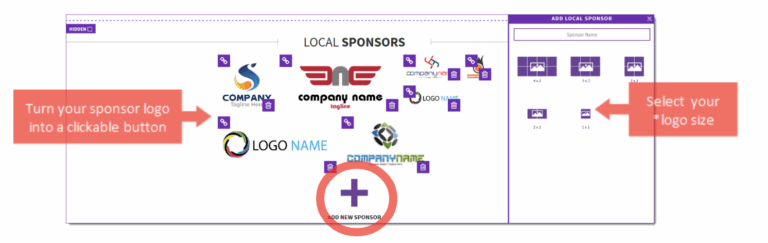
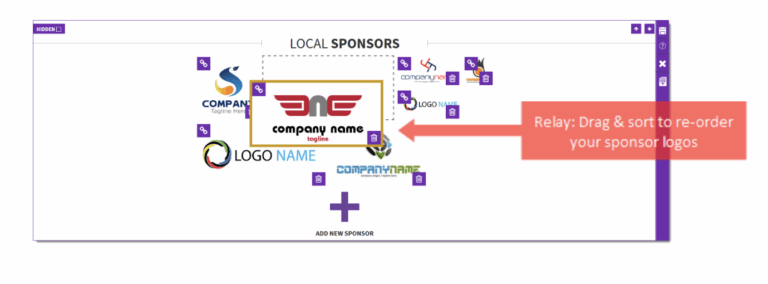
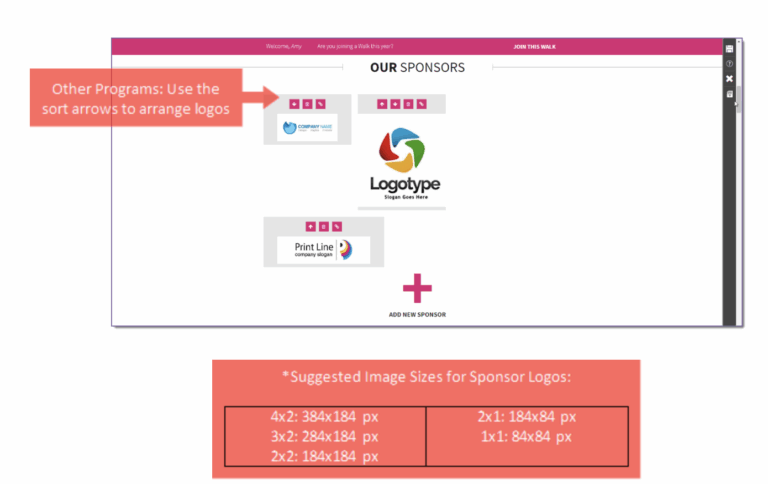
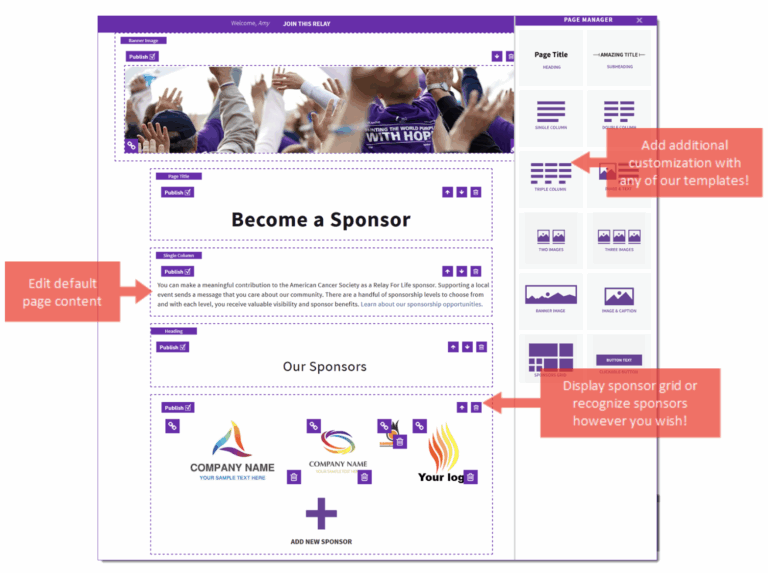
Add Local Sponsors
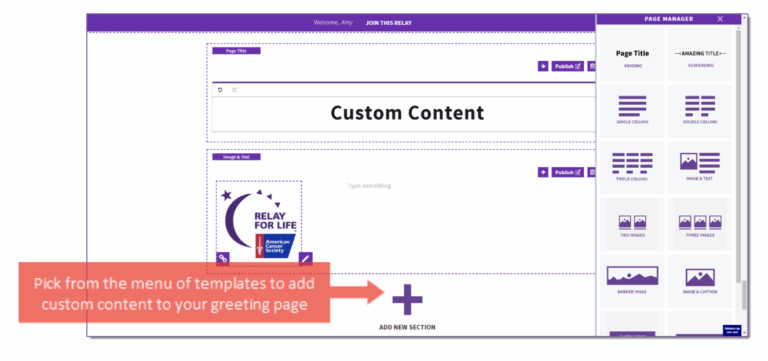
Add Custom Content
Add Event Photos
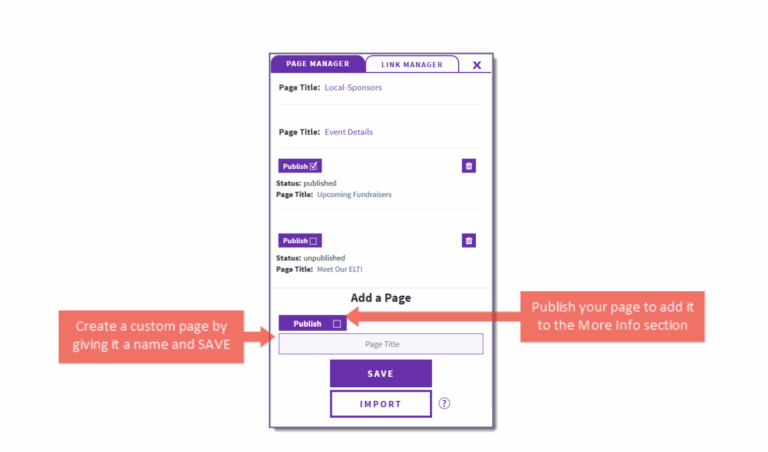
Create a Custom Page
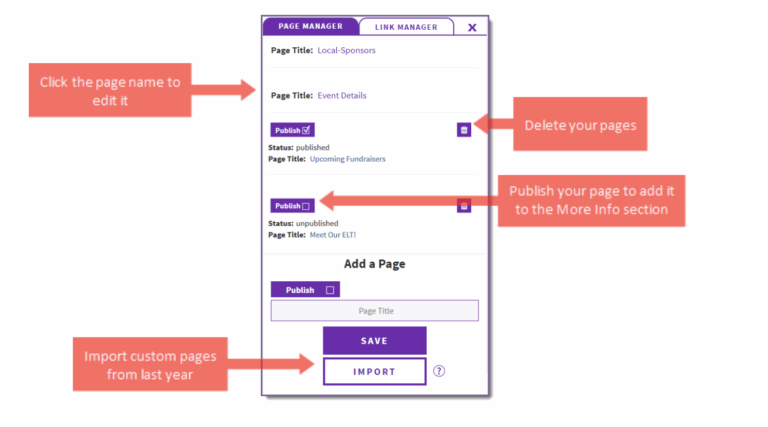
Manage Custom Pages
Customize Your Page

Edit Event Details Page
Edit Local Sponsors Page
Search for Participants

- From the EMC, click Customer Service in the top navigation bar.
- Under Related Actions, select Manage Participants.
- You’ll see a list of all registered participants.
- Find the participant by scrolling the list or using the search fields.
- Enter first name, last name, and/or email.
- Click Finish to run the search.
- Tip: Use % as a wildcard (example: Jon% will show Jon, Jonathon, etc.).
- Next to the participant’s name, click Manage Participant to open their profile.
View a Participant’s Gift History

How to View and Edit a Participant’s Gift History
From the EMC, click Customer Service.
Under Related Actions, select Manage Participants.
A list of all registered participants will appear. You can scroll to find the participant or use the search function.
Next to the participant’s account, click Manage Participant to open their profile.
On the participant’s account page, scroll to the bottom and find the Gift History section.
In the Gift History list, you can:
Change the honor roll name
Edit gift soft credit
Refund a donation
Edit the Registration Information of a Participant
Edit the Team Information of a Participant
Move a Participant to a Team
From the EMC, click Customer Service.
Under Related Actions, select Manage Participants.
Scroll through the list or use the search fields to find the participant.
Click Manage Participant to open their profile.
In the Related Actions menu on the left, click Change Team.
Select the new team from the list, or use the search bar to find it quickly.
Click Select next to the correct team, then click Finish to confirm the move.

Promote a Participant
- From the EMC, click Customer Service.
- Under Related Actions, select Manage Participants.
- Scroll or search to find the participant.
- Click Manage Participant to open their profile.
- Under Related Actions, choose Promote to Captain or Promote to Co-Captain, depending on the role you want them to have.
- Click Finish to save.
Demote a Team Captain
To demote an existing Team Captain to a regular team member:- First, promote another participant to Team Captain.
- Open the new leader’s record.
- Click Promote to Captain under Related Actions.
- Once the new captain is promoted, the original captain will automatically be demoted to a regular team member.
- First, promote another participant to Team Captain.

Search for a Team
Access a Team Profile
From the EMC, click Customer Service in the top navigation bar.
Under Related Actions, select Manage Teams.
A list of all registered teams will appear. Find the team by scrolling or using the search function.
Tip: Use % as a wildcard. Example: Walk% will find Walking, Walkers, etc.
Click Manage next to the team to open its profile.

View Team Member Roster
View Team’s Gift History
- From the EMC, click Customer Service.
- Under Related Actions, select Manage Teams.
- Scroll or use the search function to find the team.
- Click Manage next to the team to open its profile.
- On the team’s account page, scroll to the bottom and locate the Gift History section.
- In the gift list, you can:
- Change the honor roll name
- Edit gift soft credit
- Refund a donation

Edit a Team’s Registration Information
How to Edit Team Details
Navigate to Customer Service
From the EMC, click Customer Service in the top navigation bar.
Access Manage Teams
Under Related Actions, select Manage Teams.
A list of all registered teams will appear.
Find the Team
Locate the appropriate team using:
The list provided, or
The search function.
Open Team Profile
Click Manage next to the team name to access its profile.
Edit Team Details
From the team record, under Related Actions, click Edit Team Details.
Make changes as needed:
Team Name – Edit the team name.
Team Goal – Update the fundraising goal.
Team Company – Associate the team with a company.
Save Changes
Click Finish to complete the updates.

Access Reports
From the EMC, click Reports.
On the Reports page, you will see:
Name and Description: The name and description of each available report is listed in the first column.
Actions: Click Run Report to begin running the report.

Run and Download Reports

Utilizing the Report Results Tab
From the EMC, click Reports.
To review the results of reports you have previously pulled, switch to the Report Results tab.
The Report Results List page will display the reports that have been generated from your website.
Click the appropriate action from the Actions column to View, Download, Print, or Delete the data.


Accessing Past Event Manager Centers and Reports
From the EMC, click + Switch To Another Event.
Use the search function to find the past event you want to access data for.
Click Manage This Event beside the event you wish to access.
You will be directed to the prior year Event Manager Center, where you can pull reports or access previous participant information.


Note: Your prior year event will only appear in this list if you were an Event Manager from that year. If you are new to the role of Online Chair and did not have access to the Event Manager Center previously, please contact your staff partner for log in permissions.
Search for Gifts
From the EMC, click Customer Service.
Under Related Actions, select Search for Gifts.


Enter any information you know about the donor and/or donation, including:
- Donor’s first / last name or email address
- Participant’s name who the donation is credited to
- Confirmation code of the donation as listed on the gift receipt
- Value of the donation
- When the gift was made online
- Use % for wildcard. Example: Jon% if you are trying to find Jon or Jonathon
Click Finish to perform the search.
Enter Offline Donation Received
- From the EMC, click Customer Service.
- Under Related Actions on the left side of the page, click Manage Teams, Manage Participant, or Record Event Gifts, depending on how the gift should be credited.
- If you are crediting it to a team or a participant, the next step will be to search for your team or participant name and click Manage in the action column.
- Under Related Actions on the left side of the page, click Record (Team, Participant or Event) Donation.
- For Step 1 – Enter Donor Information, enter the donor’s personal information. Only name is required.
- Click Next.


- For Step 2 – Configure Gift, specify the following:
Gift Type – defaulted to one time gift
Gift Amount – enter the monetary amount of the single payment or of each payment to be received for the sponsorship level
Do Not Display Amount – check this box if the amount is not to be displayed
Recognition Name – enter the recognition name if it is different than the name on the billing information. Enter “Anonymous” if the donor does not want their name displayed.
Batch ID – enter a value to identify groups of donations processed at the same time
Payment Method – select the method of payment:
Cash
Check – if you select check, an additional field will display to enter the check number
Payment Status – If you have the donation in hand, select Confirmed
- Click Process or Process and Add Another if you have another donation to add to that particular participant, team or event.
Change the Honor Roll Scroll on a Participant’s page
Some donors may choose to be referred to by a different name or to remain anonymous. As the event manager, you may update how the donor and donation is displayed on each participant page.
From the EMC, click Customer Service.
Under Related Actions, select Search for Gifts.
Enter any information in the search fields provided, including available information about the donation. Click Finish to perform the search.


5. Skip to step 2. Configure Gift
6. Specify and update the necessary information:
Do Not Display Amount: Check the box beside “Do not display the gift amount” if the donor does not wish to have his/her donation amount displayed publicly on the personal page.
Recognition Name: If this field is left blank, the Recognition Name is defaulted to the donor’s Name, but you can update the donor’s name as s/he wishes it to appear on the Honor Roll. If the donor wishes to remain anonymous, enter “Anonymous” in the field provided.

7. Click Finish to save changes to the donation’s appearance in the Honor Roll.
Move the Credit of a Donation to another Participant or Team
From the Event Management Center, click Customer Service in the top Navigation Bar.
Under Related Actions, select Search for Gifts.
Enter any information in the search fields provided, including available information about the donation. Click Finish to perform the search.
- Beside the gift you wish to move, click the Change Soft Credit link.

- Identify who will receive credit for the donation. You can adjust the gift credit to a participant, team, or the general event. Click the appropriate radio button before clicking Search for Recipient.

- Identify the recipient of the donation through the list provided or through a search. Click Select next to the person or team to whom you are reassigning credit for the donation.

- Confirm Changes: Review the transaction information and the change in soft credit before confirming. If it is correct, click Finish and the credit of a donation will be moved.